How to put your story on Arc, our content management system (CMS)
What you’ll need:
Login: https://arcpublishing-uscannenberg.okta.com/
^that’s bookmarked on all the Media Center computers
Username is your usc email, pw should be something you picked when you created the account.
Slack Graham Clark if you need it reset or help with this.
Big picture: you’re making a new article in Composer and filling everything in.
Log into Arc
- Your username is your usc email, including @usc.edu
- Your password should be something you chose when creating your login, if you need it reset DM Graham Clark on Slack and he can help.
- The url is: https://arcpublishing-uscannenberg.okta.com/ It’s also bookmarked on the shared Media Center computers on Chrome.
Make a New Article
- Open Composer via the Arc nav bar
- Click on “Create story,” then “Click here to start a new story”

Fill Everything In
Long story short, you’re going to fill in all the necessary fields in Composer. You’ll need to enter your headline, subheadline and article, as well as populating the Planning, Metadata, Featured Media tabs. You can ignore Related Items and Clipboard.

Let’s start by filling in the right side of the screen with your article.
You’re going to put your headline, write a subhead and put the body copy of your story here.
Write your headline in first.
If you don’t have a headline yet and are not sure how to write it, ask yourself: how would you describe the point of this story to a friend? Write that down. You can talk to your editor or faculty if you want to discuss headline options.
I encourage you to just put something down without overthinking it. It can be changed later. It’s always easier to edit and rework something when you have a rough draft to start with.
Annenberg Media headline style is to not capitalize every word, so Don’t Do This.
Then write a subheadline that adds some more information.
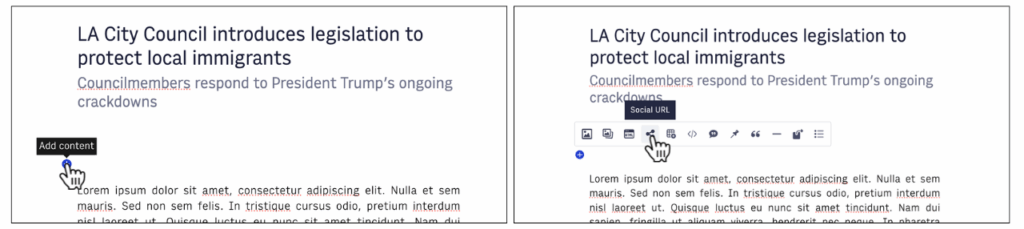
For the rest of your article paste in what you have on your finished Google doc. If you want to embed any elements, put photos in the body of the article or add more links you can do that now. Hit return for a new line and then click the little blue plus sign to view the embed tools.
You’ve got your article body copy, headline and subheadline entered? Great.
This is a good time to hit Save. Arc auto-saves regularly but it never hurts to manually save too.
Let’s look at the left column of the screen now.
———————————— Planning —————————————
This is where you choose the section for an article and add everyone who worked on the story as an author.
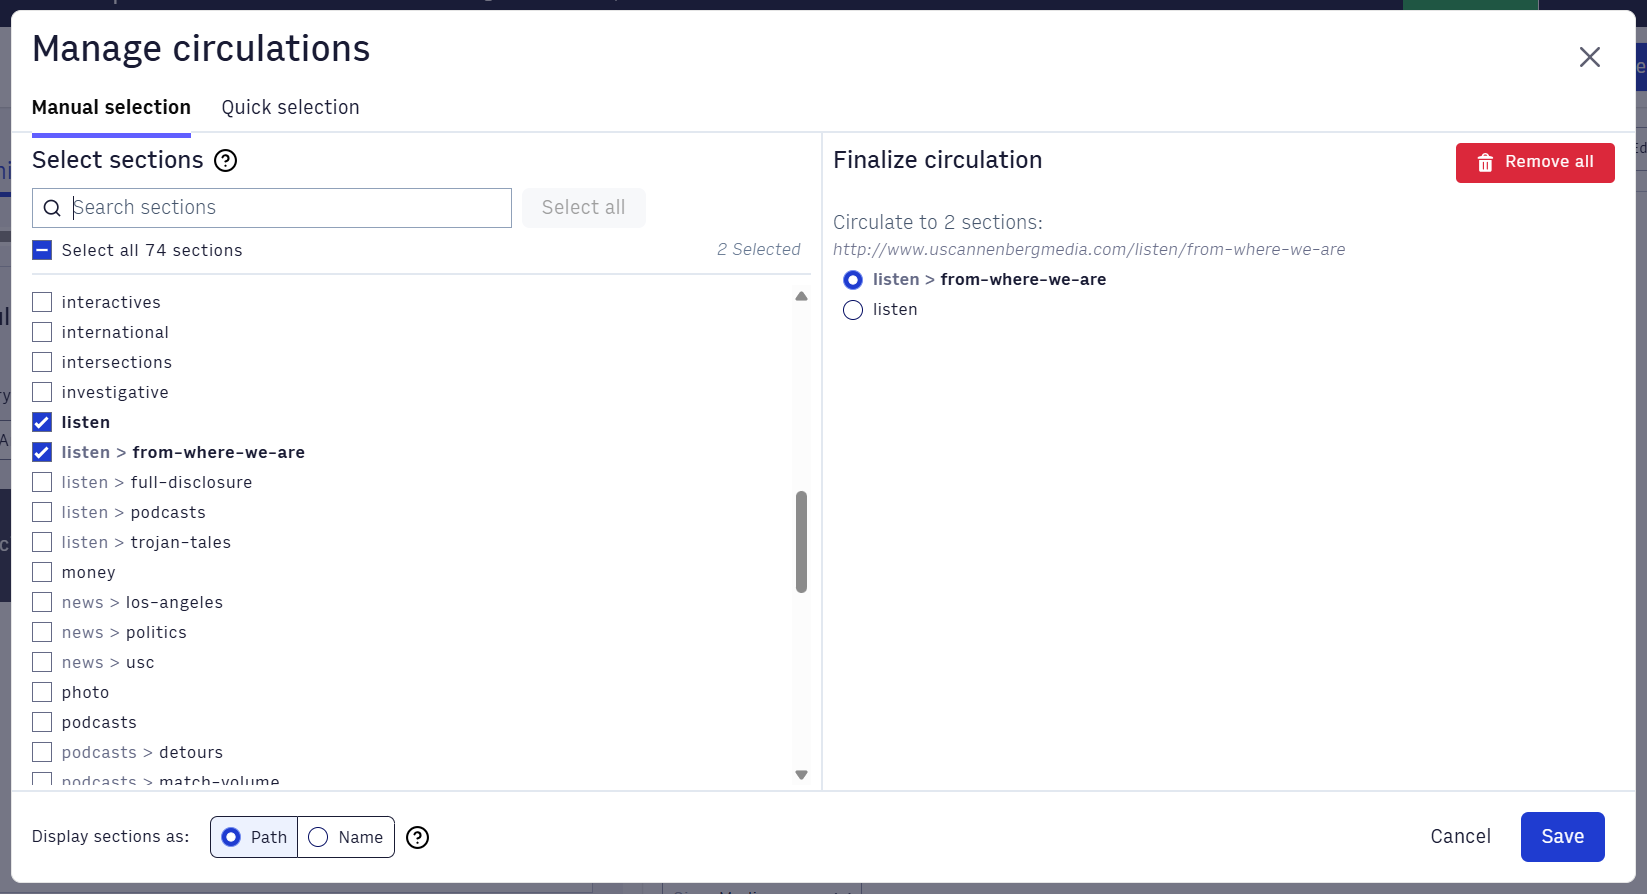
Click the Manage circulations button and select the section for this story. For example, for all USC stories select:
news > usc
then click Save circulations.
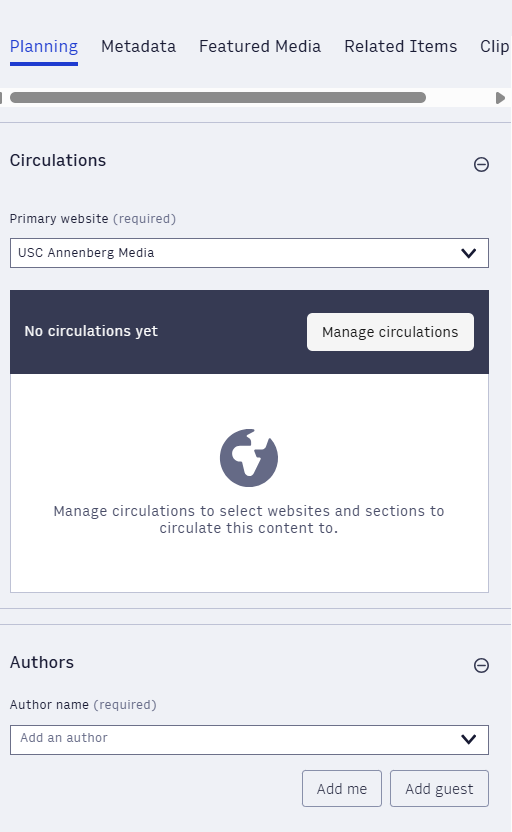
For Authors, click Add me. It should add you! Start typing in the names of anyone else who worked on the piece and their names should pop up.
You don’t want to add anyone as a guest. If someone’s name isn’t popping up ask an editor, producer or DM Graham to get them added to the author database.
If you’re not sure who worked on something, check the daily budget and/or ask an editor or producer who has been managing the story.
———————————— Metadata —————————————

This is all the Metadata that gets attached to your article.
Description: copy and paste your subhead here. You can use the same thing for both.
SEO Keywords: if there’s something people would be searching for that’s not already in your headline, add that here as a search engine optimization keyword.
Story tags: if there’s a subject that gets covered across different sections you can add a story tag for that subject here. Examples include: Covid-19, 2024 Elections
You can leave everything else on the Metadata tab as-is.
———————— Featured Media —————————
This is where you’ll upload the featured image for your story. EVERY story needs an image.
If you took a photo while you’re reporting, amazing, use that! If someone else was out in the field, ask your producer if there’s a photo you should use.
Click add media and Upload Image, then Photo Template.
When you upload a photo to Arc you need to fill in two things, the caption and alt text.
Caption: this is all that’s publicly visible under a photo. Here’s the prompt on caption style you’ll get whenever you upload a photo.
Write a sentence explaining why you’ve put this photo in your article, then credit in the following format. (Photo by NAME OF MEMBER OF ANNENBERG MEDIA)
OR
(Photo courtesy of NAME OF OUTSIDE SOURCE)
Here’s the instruction for writing Alt Text:
DESCRIBE THE IMAGE FOR ACCESSIBILITY, EXAMPLE: Photo of a chef putting red sauce onto an omelette.
Do that! You need to write the caption and alt text for every image you upload.
Step 4: When you’ve filled everything in for your article on Arc, save your story. It’s ready for a final review and to be published!